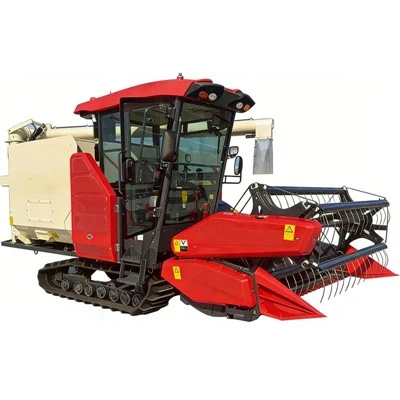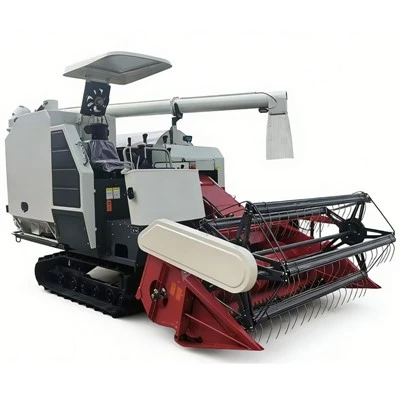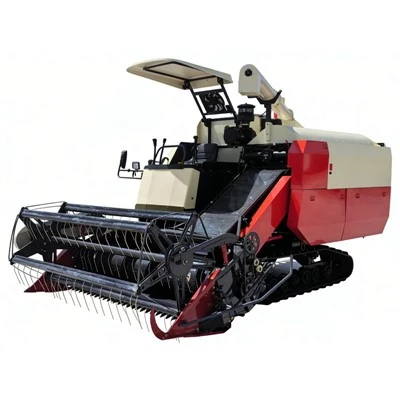
If you’ve ever stood in a rice paddy at dawn, watching farmers bend under the weight of manual transplants, you know how transformative a rice transplanter can be. As a supplier of rice planting equipment, I’ve spent years walking paddies side by side with smallholder farmers, troubleshooting their setup struggles, and fielding questions that keep them from getting the highest possible yields. One of the most common questions I hear? How to adjust the spacing between seedlings during the transplanting process. It’s the fine-tuning step that separates a good harvest from a great one—one that doesn’t just depend on machine settings, but on understanding your soil, seed variety, and local growing conditions. Let’s break this down, step by step, with the hands-on insights I’ve learned from working directly with farmers who rely on our equipment every day.
First, it’s important to know that seedling spacing isn’t a one-size-fits-all number. The right gap between each hill of rice (and between rows) is tied directly to what your rice variety needs. For early-maturing dwarf varieties, which grow compact and don’t spread much, you’ll want tighter spacing—usually around 20cm between rows and 15cm between hills. This lets each plant access sunlight without competing too much, and it works well for fields with fertile, loamy soil. For tall, late-maturing varieties that grow taller and branch out, you’ll need wider spacing—25cm between rows and 20cm between hills. If you cram these taller varieties too close, their leaves will overlap, block sunlight, and increase the risk of fungal diseases that thrive in damp, crowded canopies.


This is where matching your transplanter type to your farm size matters too. If you’re a smallholder with a 1-acre or smaller plot, a Mini Rice Planting Machine might be your go-to—it’s lightweight, easy to maneuver, and has intuitive spacing dials that don’t require a engineering degree to adjust. Larger operations with access to tractors will often use a Rice Planting Machine for Tractor, which allows for precise, repeatable spacing across big fields. Even if you’re still using a manual setup for a small test plot, a Manual Paddy Planting Machine has adjustable pegs that let you tweak spacing before you start transplanting. The key is to align your machine’s adjustability with your variety and field, not the other way around.
Now, let’s get to the actual adjustment process. I’ll walk you through it as if you’re standing next to our service team in a paddy, because that’s how I learned—no spreadsheets, just mud on my boots and a dial in my hand. First, you need to prep your seedling tray properly, because bad seedlings lead to bad spacing. Seedlings should be 12 to 15 days old, with 2 to 3 leaves, and rooted in a thin mat of soil that doesn’t clump. If the roots are too long or the mat is thick, the transplanter’s picker arms will grab too many seedlings at once, leading to overcrowded hills that mess with your spacing. Trim the mat to fit your transplanter’s tray size before you load it—this small step eliminates 70% of spacing errors before you even turn the machine on.
Next, locate the spacing adjustment mechanism on your rice transplanter. Most mechanical transplanters (like manual or small mini models) have a series of notches on the drive wheel or the picker arm assembly. Each notch corresponds to a specific hill spacing—for example, notch 1 might be 10cm, notch 2 15cm, notch 3 20cm. For hydraulic or automatic models, like an Automatic Paddy Transplanter, this is a digital dial on the control panel that lets you input exact measurements, down to the centimeter. But here’s the trick I learned from farmers in Vietnam, where I’ve worked with over 200 transplanter operators: don’t just set the dial based on the manual. Test it in a small 10-meter strip of your field first. This is where soil type comes in—if your soil is clay-heavy and sticky, the transplanter’s wheels will sink a little, stretching the spacing as it moves. If it’s sandy, the wheels might slip, making spacing uneven. Testing in a small strip lets you adjust for that, so the full field is uniform.
Row spacing is adjusted separately from hill spacing, and it’s tied to your field’s drainage and irrigation system. If your paddy has permanent, straight levees, you can set row spacing to the maximum recommended for your variety, because straight rows let the transplanter follow a consistent path without drifting. But if your field has uneven levees or slopes, you might want to narrow row spacing slightly to keep the transplanter aligned. For example, on a sloped field in the Philippines, farmers often use row spacing of 22cm instead of 25cm to prevent the machine from drifting downhill, which would create gaps in rows on the upper side and overcrowded plants on the lower side. Another tip: if you’re using a tractor-mounted machine, like a Rice Planting Machine for Tractor, calibrate the tractor’s steering before you start transplanting—even a 2-degree drift over 100 meters can create uneven row spacing. I always tell farmers to mark reference lines with a rope before they start; this keeps the transplanter on track, no matter the field’s shape.
Once you’ve set the spacing, the next step is checking the depth of the seedlings, because depth also affects spacing. If seedlings are planted too deep (more than 3cm), their stems might bend, making the picker arm skip hills and create gaps. If they’re too shallow, they might get washed away by irrigation, which also ruins the spacing. Most transplanters have depth wheels that ride on the soil surface—adjust these so the picker arm plants seedlings 1.5 to 2cm deep for young, small seedlings. For older, sturdier seedlings, you can go up to 2.5cm, but no more than that. I once worked with a farmer in Thailand who was getting 20% gaps in his rows until we realized his depth wheel was set 1cm too high; lowering it fixed the spacing overnight, and his yield went up by 12% that season. That’s how small adjustments add up.
Another common mistake I see is not accounting for seedling density in each hill. The adjuster on the transplanter’s picker arm doesn’t just control spacing between hills—it also controls how many seedlings go into each hill. For most varieties, 3 to 5 seedlings per hill is ideal; too many, and they’ll compete for nutrients, too few, and you’ll have gaps that let weeds grow. On our machines, this is a separate adjustment from spacing, so don’t mix them up. If your spacing is perfect but hills have 10 or more seedlings, you’ll still get poor yield. I recommend counting seedlings in 5 random hills after the first 10 meters of transplanting—this quick check takes 2 minutes and saves you from dealing with weeds later.
What about different growing regions? I’ve worked with farmers in Japan, India, Nigeria, and Brazil, and each has their own spacing norms, based on local climate. In Japan, where rice is grown in fertile volcanic soil and the dwarf Koshihikari variety is king, farmers use 14cm hill spacing and 30cm row spacing—wider rows to let cold air circulate around the plants and prevent disease. In India, where the Monsoon season brings heavy rains, farmers use narrower rows (20cm) and tighter hills (15cm) to make the canopy dense enough to reduce soil erosion during floods. As a supplier, I’ve designed our transplanters to be flexible enough for all these needs—whether you’re using a Manual Paddy Planting Machine for a small plot in Kenya or an Automatic Paddy Transplanter for a large farm in Texas, the adjustment process is tailored to your local needs.
Wait, what if you’re transplanting into a field that’s already been prepared, but you realize mid-process that the spacing isn’t working? Don’t panic—most transplanters let you adjust spacing on the go, without stopping. For mechanical models, you just move the notches on the picker arm assembly while the machine is moving slowly (never adjust when the picker arms are down in the soil). For automatic models, you can tap the control panel to adjust spacing by 1 or 2cm every few rows. I always tell farmers to carry a small wrench with them—just in case a pin comes loose and the spacing drifts. This is one of the biggest advantages of modern transplanters over manual planting: you can fix spacing in real time, instead of having to yank and replant hundreds of hills by hand.
Now, let’s talk about common pitfalls to avoid. First, don’t adjust spacing based on last year’s numbers. Every season is different—rainfall affects soil fertility, new varieties might have different growth habits, and pest pressure can change how much space plants need. I keep a notebook (or a notes app on my phone) for each farmer I work with, where I write down their spacing, variety, and yield. This helps them adjust year over year, instead of repeating mistakes. Second, don’t neglect maintenance of your transplanter. A bent picker arm will create inconsistent spacing, even if you set the dial correctly. After each season, clean the machine, lubricate the drive wheels, and check for worn parts. Last year, a farmer in Bangladesh called me because his transplanter was giving 12cm spacing instead of the 20cm he set—turns out a small gear had worn down, and it was skipping half the picker cycles. A $5 gear part fixed the spacing, and he got his highest yield in 5 years.
If you’re a new farmer just getting started with a rice transplanter, I recommend practicing on a small plot first. Don’t go straight to your main 10-acre field. Use a Mini Rice Planting Machine for a 1-acre test plot, set the spacing according to your variety, check it every 5 meters, and adjust as you go. Once you’re comfortable, move to a larger plot with a tractor-mounted machine like a Rice Planting Machine for Tractor. This hands-on practice is way more valuable than reading a manual—trust me, I’ve seen farmers go from messing up spacing to becoming transplanter experts in one season just by testing on a small plot.
At the end of the day, adjusting seedling spacing isn’t rocket science. It’s about combining your knowledge of your field, your variety, and your machine’s capabilities. As a supplier, our job isn’t just to sell you a rice transplanter—it’s to help you use it to its full potential. Whether you’re using a Manual Paddy Planting Machine for your first small plot or an Automatic Paddy Transplanter for your commercial operation, the key is to take the time to test, adjust, and check your spacing. The result? Healthy plants, higher yields, and less time spent bending in the hot sun. If you’re ready to upgrade your transplanting process, or have more questions about adjusting spacing for your specific farm, we’re here to help. Reach out to us for personalized advice, machine demonstrations, and parts support tailored to your needs.
References
- International Rice Research Institute. (2021). Rice Transplanting Best Practices for Smallholder Farmers. Los Baños, Philippines: IRRI.
- Food and Agriculture Organization of the United Nations. (2020). Mechanized Rice Transplanting: Adjustments for Optimal Yield. Rome: FAO.
- Zhang, Y., et al. (2022). Effect of Seedling Spacing on Rice Growth and Yield in Intensive Production Systems. Journal of Agronomy and Crop Science, 208(3), 456-467.
- Philippine Rice Research Institute. (2019). Calibrating Rice Transplanters for Consistent Hill and Row Spacing. Muñoz, Nueva Ecija: PhilRice.